The Touch Bar may be one of Apple’s most debated MacBook Pro features, but for musicians, tinkerers, and creative coders, it remains a surprisingly fun little performance surface. Its long, narrow OLED strip is not a replacement for a full MIDI keyboard, but it can become a miniature piano, chord trigger, sample launcher, or experimental controller. For Mac users who enjoy combining music, software, and playful interface design, Touch Bar piano projects offer a compact way to explore sound without needing extra hardware.
TLDR: Touch Bar piano projects let Mac users turn the MacBook Pro Touch Bar into a small musical keyboard or MIDI controller. They are best for sketching melodies, triggering chords, learning notes, experimenting with custom controls, or building creative coding projects. While the Touch Bar is limited in size and tactile feedback, it can still be a surprisingly expressive tool when paired with apps like GarageBand, Logic Pro, MainStage, or custom MIDI utilities.
Why Turn the Touch Bar Into a Piano?
At first glance, the Touch Bar seems like an odd place for a piano. It is thin, smooth, and has no physical keys. Yet that is exactly what makes it interesting. Unlike a traditional keyboard, the Touch Bar is a blank digital strip. It can display piano keys, drum pads, sliders, chord names, scales, or even colorful reactive visuals.
For Mac users, the appeal usually falls into a few categories:
- Portability: You always have the Touch Bar with you if you use a compatible MacBook Pro.
- Quick musical sketching: It is useful for testing a melody, bassline, or chord idea without connecting a controller.
- Interface experimentation: Developers can design unusual music tools using Swift, JavaScript, MIDI scripting, or automation utilities.
- Learning and play: Beginners can use labeled keys and scale layouts to understand music theory visually.
- Performance novelty: It is visually striking and fun in live streams, demos, or classroom settings.
The Touch Bar’s limitations can also become creative constraints. Because the playing surface is small, many projects focus on smart musical shortcuts: fixed scales, chord banks, arpeggiators, octave buttons, and expressive slides rather than full two-handed playing.
The Basic Touch Bar Piano Concept
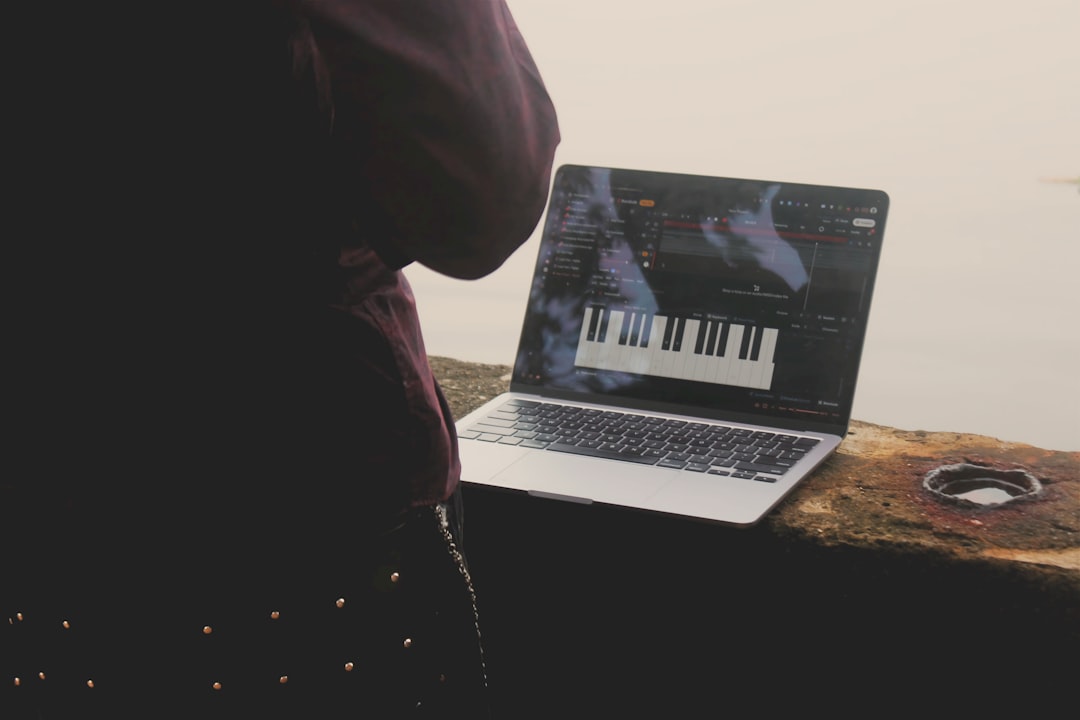
A typical Touch Bar piano project displays a row of virtual piano keys across the OLED strip. When the user taps a key, the Mac plays a note using either an internal sound engine or MIDI output. Some versions show white and black keys like a real piano, while others use colored rectangular pads for better finger targeting.
The simplest version works like this:
- The Touch Bar shows a set of notes, such as C, D, E, F, G, A, and B.
- The user taps a note.
- The app detects the touch event.
- A sound is generated using a software instrument or sent as a MIDI note.
- The Touch Bar may visually respond with color, animation, or note labels.
More advanced versions add velocity simulation, octave shifting, sustain, scale locking, chord buttons, or integration with digital audio workstations. Although the Touch Bar does not detect velocity like a real MIDI keyboard, developers can simulate dynamics using gestures, sliders, pressure where supported through related trackpad input, or mapped buttons for soft and loud notes.
Using Existing Touch Bar Piano Apps
The easiest way to start is by trying an existing Touch Bar piano or MIDI controller utility. Several small apps and open-source experiments have appeared over the years, often created by independent developers who wanted to test what the Touch Bar could do beyond emoji suggestions and volume controls.
These apps usually fall into two groups:
- Standalone piano apps: These play sounds directly from the Mac, often using simple synth tones or sampled piano sounds.
- MIDI controller apps: These send MIDI notes to GarageBand, Logic Pro, Ableton Live, MainStage, or other music software.
If you want to use the Touch Bar with a DAW, look for an app that supports Core MIDI, Apple’s built-in MIDI system. On macOS, MIDI routing can often be handled through the Audio MIDI Setup utility and the IAC Driver, which creates a virtual MIDI cable between apps. Once configured, your Touch Bar piano can trigger any software instrument loaded in your DAW.
For example, you might open GarageBand, create a software instrument track, select an electric piano sound, and then use the Touch Bar piano app as an input source. The result is a mini performance setup with no external keyboard required.
Building a Touch Bar Piano With Custom Tools
For users who enjoy customization, one of the most rewarding approaches is to build a Touch Bar piano layout using a Touch Bar customization tool. Utilities such as BetterTouchTool and similar automation-focused apps allow users to create custom Touch Bar buttons, scripts, and actions. While they are not always designed specifically for musical performance, they can be adapted for note triggering and MIDI control.
A basic custom layout might include:
- Seven note buttons: C, D, E, F, G, A, B.
- Octave controls: Buttons to move the range up or down.
- Chord buttons: C major, G major, A minor, F major.
- Transport controls: Play, record, stop, loop.
- Expression sliders: Volume, filter cutoff, modulation, or reverb.
This type of setup is ideal for producers who want a compact command strip above the keyboard. You could use the left side for musical input and the right side for DAW controls. With some scripting, a tap on a Touch Bar button can send a MIDI note, trigger an AppleScript command, launch a shortcut, or activate a specific function inside your music software.
The key is to think of the Touch Bar not as a full piano, but as a musical control panel. It is best when it performs targeted tasks quickly.
Using the Touch Bar With GarageBand and Logic Pro
GarageBand and Logic Pro are natural companions for Touch Bar music projects because they already support software instruments, MIDI recording, and macOS audio routing. If your Touch Bar piano app sends MIDI, it can usually be recorded just like an external keyboard.
In a practical setup, you can:
- Open GarageBand or Logic Pro.
- Create a new software instrument track.
- Choose a sound, such as grand piano, synth lead, strings, or bass.
- Launch your Touch Bar piano or MIDI controller app.
- Select the correct MIDI input if needed.
- Record your performance into the timeline.
Logic Pro users can take this further by mapping Touch Bar buttons to Smart Controls, plug-in parameters, or key commands. A Touch Bar project does not have to be limited to notes. It can become a performance strip for changing patches, toggling effects, muting tracks, or controlling automation.
One especially useful idea is to create scale-safe layouts. Instead of showing every chromatic note, the Touch Bar can display only notes from a chosen scale, such as C major, A minor pentatonic, or D Dorian. This reduces wrong notes and makes improvisation much easier on such a narrow surface.
Creative Project Ideas for Mac Users
Once you understand the basics, Touch Bar piano projects can become much more imaginative. The Touch Bar’s compact size encourages musical tools that are focused, playful, and visually clear. Here are several project ideas worth exploring.
1. Mini Scale Piano
Create a layout where the Touch Bar displays only the notes of a selected scale. Add buttons to switch between major, minor, pentatonic, blues, and modes. This is excellent for improvisation because every note fits the musical context.
2. Chord Progression Trigger
Instead of individual notes, each Touch Bar button triggers a full chord. You could build common progressions such as I–V–vi–IV, ii–V–I, or 12-bar blues. This is helpful for producers who want to audition harmonic ideas quickly.
3. Arpeggiator Strip
Design a Touch Bar interface that plays arpeggios when you tap or slide. Buttons can control direction, speed, octave range, and pattern. Pair it with a synth in Logic Pro for a compact electronic music tool.
4. Drum and Bass Companion
Use half of the Touch Bar for bass notes and the other half for drum hits. While it will not replace a pad controller, it can be fun for sketching loops on a train, in a café, or during a quick writing session.
5. Visual Music Tutor
Create a Touch Bar piano that lights up notes, labels intervals, or guides the user through simple songs. Because the Touch Bar can change its display dynamically, it can become a tiny interactive music lesson strip.
Coding Your Own Touch Bar Piano
For developers, making a Touch Bar piano is a great way to learn about macOS interface programming and audio. A native Swift app can use NSTouchBar to create buttons and custom views. For sound, you can use Apple’s AVFoundation framework, AudioKit-style audio tools, or MIDI output through Core MIDI.
The basic architecture might look like this:
- Interface layer: Draws piano keys or pads on the Touch Bar.
- Input handler: Detects taps, releases, and gestures.
- Note mapper: Converts each button into a musical pitch.
- Sound engine: Plays audio or sends MIDI.
- Settings panel: Lets users choose scale, octave, instrument, and MIDI destination.
A strong design choice is to make the keys larger than they would be on a realistic piano graphic. Real piano proportions look nice but can be hard to play accurately on the Touch Bar. Many successful layouts use chunky pads with labels because they are more reliable during performance.
If you prefer web technologies, you can prototype musical logic in JavaScript and use Web MIDI concepts, though direct Touch Bar access is more practical through native macOS development or automation utilities. For serious projects, Swift offers the best integration and performance.
Performance Tips and Limitations
The Touch Bar is fun, but it has real constraints. It lacks physical key travel, velocity sensitivity, and the width needed for complex playing. Fast passages can be difficult, and accidental touches are common if the layout is too crowded.
To get better results, follow these tips:
- Use fewer keys at once: Seven to twelve well-spaced buttons are often better than a full chromatic keyboard.
- Add octave controls: Keep the playable area simple while still covering a wide range.
- Use scales and chords: Musically intelligent layouts make the hardware feel more capable.
- Provide visual feedback: Color changes help users know which notes are active.
- Map sliders carefully: The Touch Bar is excellent for smooth filter sweeps, pitch bends, and volume fades.
- Keep latency low: Use efficient audio settings and avoid routing chains that introduce delay.
It is also worth noting that Apple has phased out the Touch Bar on most newer MacBook Pro models. That makes these projects somewhat niche, but not obsolete. Many musicians still use Touch Bar MacBooks, and the feature remains a fascinating example of adaptable hardware waiting for creative uses.
Who Are Touch Bar Piano Projects Best For?
Touch Bar piano projects are especially appealing to Mac users who like compact tools and creative experiments. Songwriters can use them for quick melody capture. Producers can trigger chords while editing. Teachers can demonstrate scales. Developers can explore music interface design. Streamers and content creators can use them as an eye-catching performance gimmick.
They are less suitable for pianists who need expressive two-handed playing or realistic technique practice. If you need velocity, aftertouch, and full-range performance, a dedicated MIDI keyboard is still the better choice. But if you want a small, clever, always-available musical surface, the Touch Bar can be surprisingly useful.
Final Thoughts
The best Touch Bar piano projects embrace the Touch Bar for what it is: a slim, dynamic, programmable strip that can become many things. It may not replace traditional instruments, but it can inspire new workflows and playful musical ideas. With the right layout, a MacBook Pro Touch Bar can become a miniature piano, chord machine, MIDI controller, learning tool, or experimental synth interface.
For Mac users who enjoy making music in unconventional ways, the Touch Bar remains a small but memorable canvas. Whether you install a simple piano app, build a MIDI layout, or code your own custom instrument, the result is the same: a familiar laptop feature becomes a tiny doorway into sound.